A Leather Portage Collar
Engaged by a trader for the North West Company to provide meat for the post, a woodland hunter plunges into the bottomlands surrounding the headwaters of the River Raisin in search of fresh venison. The year is 1792. Expecting to stay the night in the forest, this hearty woodsman slings a rolled wool blanket, bound with a leather portage collar, over his shoulder…
The introduction spoke of the many names associated with the burden strap. In the end, the name and strap design is dictated by the documentation and research that supports one’s persona. That research should point to a proper name, a construction material and a design that represents the persona’s time period, geographical location and station in life.
The term “portage collar” appears with some degree of regularity in the writings of individuals who plied the rivers and streams that empty into the Great Lakes region. Voyageurs, clerks and fort hunters who lived in this area in the 18th century’s last quarter either were familiar with the portage collar or owned one to assist in their daily lives. The accounts attributed to Sherman Hall and Archibald McDonald stated the portage collars were made of leather and give approximate dimensions. Let us now look at re-creating an 18th-century portage collar.
Making a Leather Portage Collar
As with all traditional black powder hunting “How-to” projects, the portage collar begins with a design plan. This is a simple accoutrement, and the plan does not need to be elaborate. However, a plan is an invaluable asset that helps the maker visualize the overall project and assess whether the finished product will closely resemble known artifacts from the chosen bygone era.
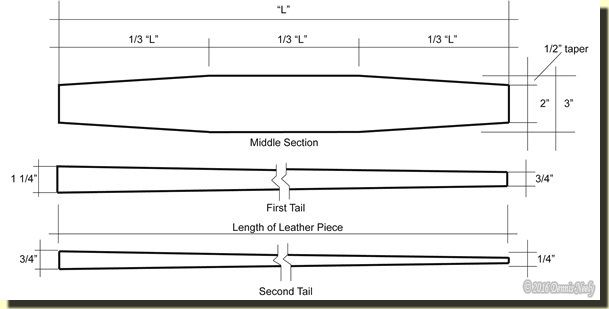 The historical accounts all speak of a wider “brow band,” or “middle section,” and most state that the band tapers to the ends where the “tails” are attached. The brow band length varies from eighteen inches to an implied maximum of about four feet; because of this variance, the plan I use does not specify a length.
For this collar, I had a cutting of 4 – 5 ounce commercial-tanned cowhide, which is about one-eighth inch thick. The piece’s usable length was fifty inches, so I decided to make the brow band twenty-four inches long, which would leave enough material to make a second brow band. The original portage collar’s brow band was three inches wide and tapered to two inches. These dimensions worked well over the years, so I chose to stay with them.
Using a pencil and a straight edge, I drew out the brow band on the leather’s smooth side. Following the plan, I left the middle eight inches full width (1/3 “L”), then tapered the last eight inches on each end to two inches in width.
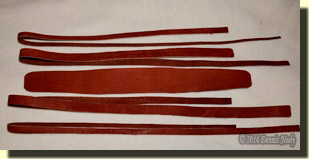 Because the portage collar has two long tapered tails made by sewing two pieces together (the “first tail” and the “second tail”), I penciled out the “first tail’s” dimensions on the cutting’s other long edge with the broad end to the right. I then reversed the layout with the second “first tail’s” broad end to the left. Thus, the tails share a common side, which eliminates any waste. I then drew out the “second tails” in a like manner.
Again, safety is always a first concern. I use the portage collar to drag deer from the glade, so before I began cutting I carefully inspected both sides of the leather to make sure there were no “skinning cuts” or potential weak spots.
In addition, when the collar is completed and oiled, I work the tails over a round rod clamped in the vice, tugging harder and harder as I pull the leather back and forth over the rod. Then I take the collar outside and tie the tails to a fixed object, like a tree or a pickup bumper. I put the brow band over my chest, and with great care, I lean into the collar adding pressure slowly to test for any leather fiber weakness, BEFORE I have to depend on the collar in the midst of a time-traveling adventure.
James A. Hanson’s illustration in the Voyageur’s Sketchbook states the tails are “Sewn with linen thread. Later examples also have a copper rivet.” (Hanson, James A., 24) I have had poor luck with linen thread pulling apart after extended use. Based on this experience and with safety in mind, I chose artificial sinew to sew the portage collar’s components together, and I used a basic saddle stitch.
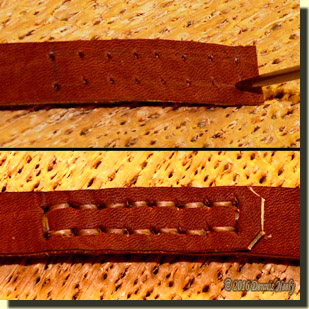
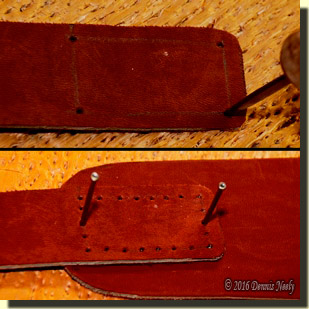 On the broad end of the first tail, I marked out a rectangular stitch line to secure the last two inches of that end to the brow band. With a sharp awl and a backer board, I began punching stitch holes about a quarter inch apart through the tail.
With those holes completed, I positioned the tail over the end of the brow band and punched a hole in the top and bottom center holes. Before I went on, I tapped a #4 finish nail through both holes and into the board, which held the tail to the brow band while I punched the remaining holes.
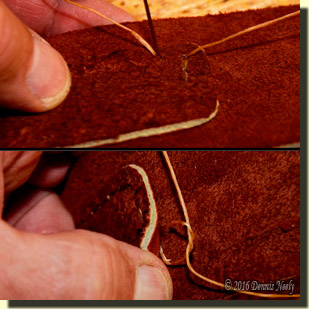 Using two needles and an appropriate length of artificial sinew, I began saddle stitching the tail to the brow band with the tail’s smooth side against the brow band’s rough or flesh side. Viewed from the smooth side, the tail will be sewn under the brow band with all smooth surfaces visible on the outward face.
There is no right or wrong place to start the stitches, but out of habit I like to begin at the top center. This allows me to knot the sinew in an area that will receive little working pressure. After each stitch, I pulled the sinew to tighten the stitch. I keep two cuttings of stout elk leather close by and run the sinew over the leather to keep the sinew from cutting into my finger joints.
 I followed the same steps to fasten the matching widths of the second tail to the first tail, smooth-sides showing with the second tail under the first, using about a two-inch lap. Because this connection is narrower, the long-side stitch lines are only one-quarter inch apart. With one tail completed, I repeated the process for the other tail.
With the two tails attached to the brow band, I began applying a liberal coating of neatsfoot oil with my fingers to both sides of the stiff leather. After the neatsfoot oil soaked into the leather, I worked the tails over a finger-sized steel rod clamped in the bench vice.
For this collar, a second coat of neatsfoot oil seemed necessary, followed by another stretching workout over the clamped rod. I then hung the portage collar in a warm place to dry. A few days later the leather still felt oily so I washed it in warm water and dishwashing soap, rinsed it, toweled it off and hung it up again.
Think about adding a portage collar to your kit, be safe and may God bless you.
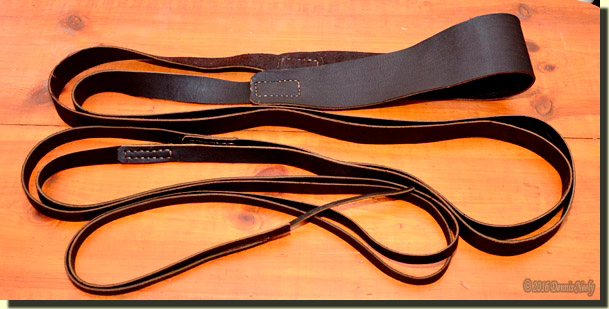
The finished leather portage collar.
